 加载中…
加载中…如何运用粗糙表面纹理
标签:
杂谈 |
分类: PS |
Step 12第十二步
Select a soft-edged (0% Hardness) brush, loaded with white (as the foreground color) and set to 16% Opacity. 选择一个soft-edged(0%硬度)刷,充满了白(为前景色)和设置为16%不透明度。Paint directly on the Layer Mask. 油漆直接在层口罩。Press Command + H to hide selection the, if it helps. 按命令+ H隐藏选择,如果它是有帮助的。Draw over several times, applying more at the shadow source and less as you get further from the harsher shadows.在几次,运用吸引更多和更少的影子就能来源再苛刻的阴影。
Step 13第13步
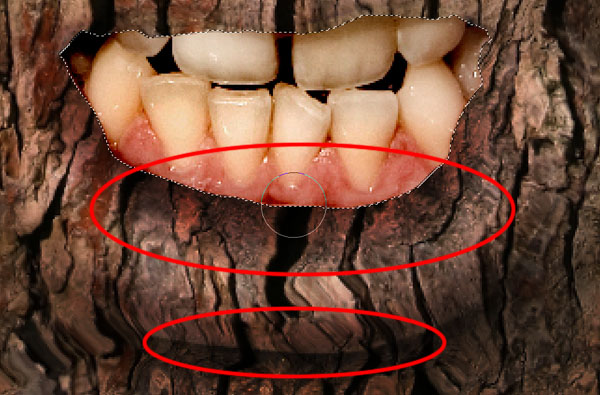
Draw around other features which produce hard lines such as the bottom lip. 画周围其他特征产生硬线条如底部的嘴唇。Draw the Shadows in the same manner.画出的阴影,在同样的方式。
Step 14步骤14
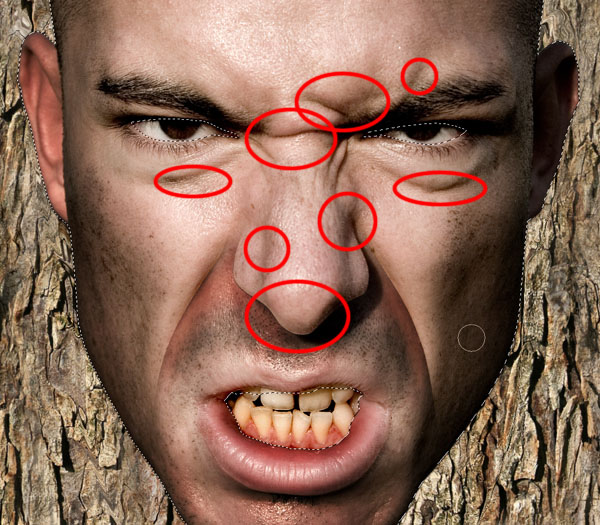
Create a selection from the “Face” layer by Command-clicking the layer thumbnail. 创建一个选择从“面子”Command-clicking层的层缩略图。Draw all the shadows in…所有的阴影画…
Step 15步骤十五
…Changing the Brush size to suit size of the area you’re treating. …改变笔刷的大小尺寸的地区适合你对待。Around the lip for example, use a small brush.例如,在唇上用一个小刷子。
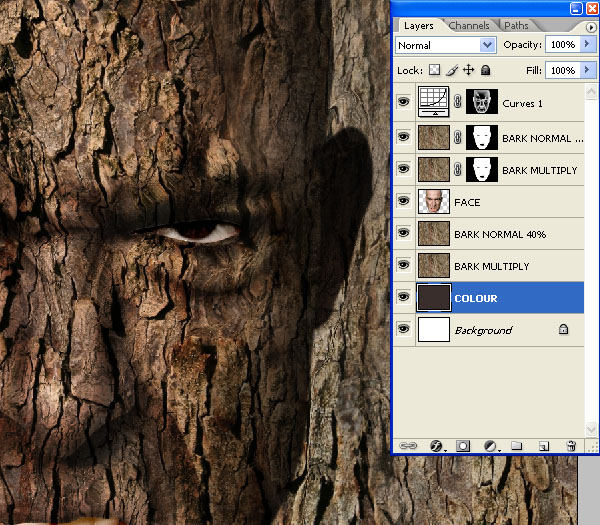
Step 16步骤十六
Turn the “Bark” layers off to see the key areas of shadow. 把“树皮”层去看看这关键领域的影子。You can still work on the Mask with the face showing. 你还能工作的脸掩上。I flick between working with the “Bark” visible and invisible.我挥挥手工作存在“树皮”看得见与看不见的。
Step 1717步
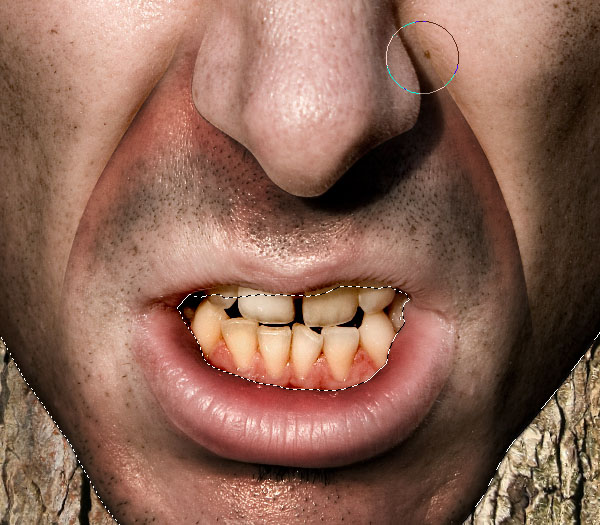
In order to soften or erase any shadows that you’re not happy with, change the brush color to black and draw on the mask in the same way as before. 为了减轻或消除任何影子,你不满意,改变笔刷的颜色黑色和画在面具一样的过。Keep working on the Mask until you get it right.坚持不懈,直到你得到的面具,它的权利。
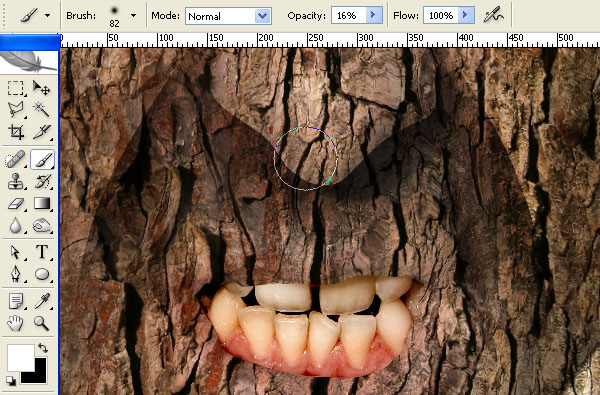
Step 18加强18日
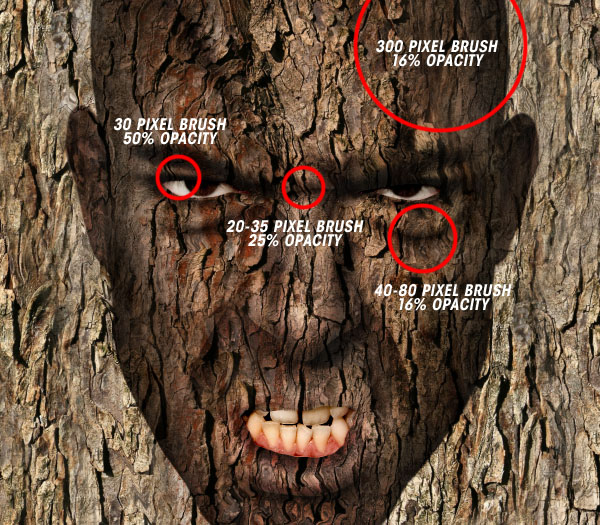
Whilst drawing on the Mask, you should be changing your brush size and the opacity to suit the shadow. 虽然取材于面具,你应该改变你的刷子大小和不透明度到适合的影子。For a big gradual shadow you’ll want around a 300 pixel brush set to 16% Opacity, all the way down to 18 pixels and increasing the opacity to suit. 为一个大逐渐影子你会希望在300像素的笔刷设置为16%的不透明度,一路下降到18个像素,提高不透明度到西装。Finally, apply a 0.6 pixel Gaussian Blur to the Adjustment Curve Layer Mask to soften the hard edges.最后,运用一个0.6像素高斯模糊调整层口罩软化曲线尖锐边缘。
Step 1919步
Duplicate the “Bark” Layer that sits beneath the “Face” Layer. 复制“树皮”下面层位于“脸”层。Set them up so they are the same as the top Bark layers, one Normal at 40% opacity, one Multiply at 100%. 立,所以他们是一样的,第一层顶端树皮正常,在40%的不透明性,一加增100%。Then under those two layers create a new layer and fill it with C=61%, M=66%, Y=66%, and K=62%.在这些两层然后创建一个新的层,填补它与C = 61%,M = 66%,Y = 66%,K = 62%。
Step 2020步
Create a selection from the “Face” Layer (Command-click the Layer thumbnail) and go to Select > Inverse. 创建一个选择从“面子”层(Command-click层缩略图),去选择>逆。Then go to Select > Modify > Expand. 然后去选择>修改>扩展。Give it a 1 pixel expansion. 给它一个1象素的扩张。Select the Curves Adjustment Layer Mask and Fill the selection with 20% black.选择曲线调整层面具和填补选择20%黑色。
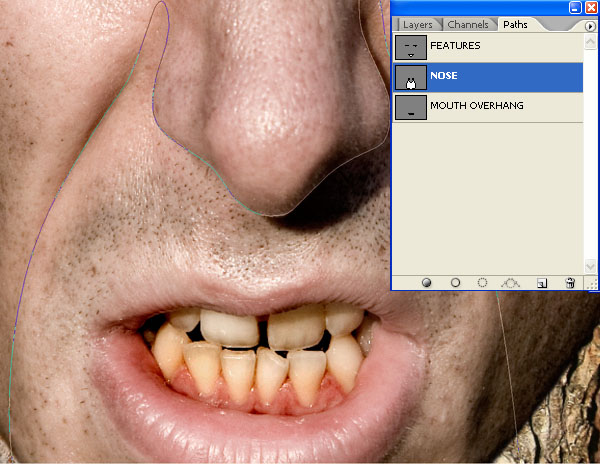
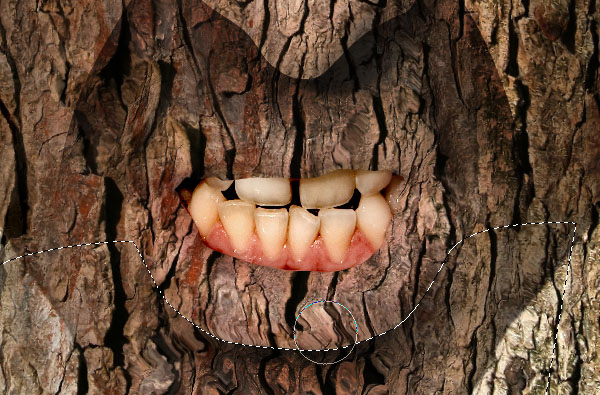
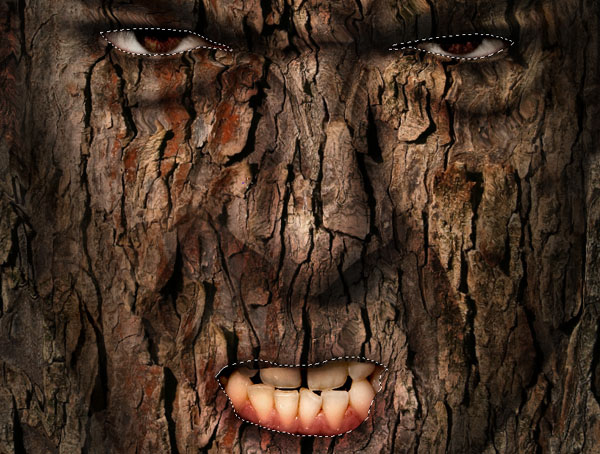
Step 21第21步
Create a selection from the Eyes/Mouth Path you made earlier. 创建一个选择从眼睛/嘴巴路径你早些时候发表。Add some shadows by drawing on the Curves Adjustment Layer Mask.添加一些阴影,通过吸收曲线调整层的面具。
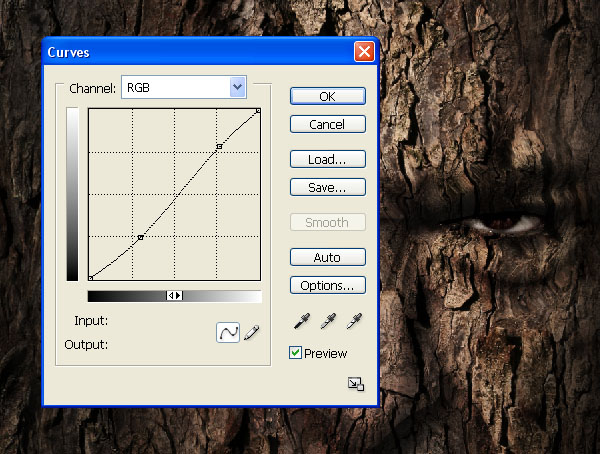
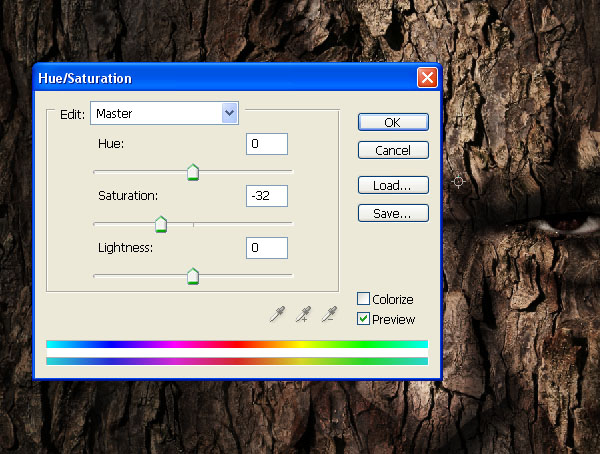
Step 2222步
To further fuse the elements together, and to grade the image, add a Curves and a Hue/Saturation Adjustment Layer to the top of the Layers hierarchy.为了进一步融合在一起,品位的元素的形象,加上曲线和一个色调/饱和度的调整层,顶部的层的层次。
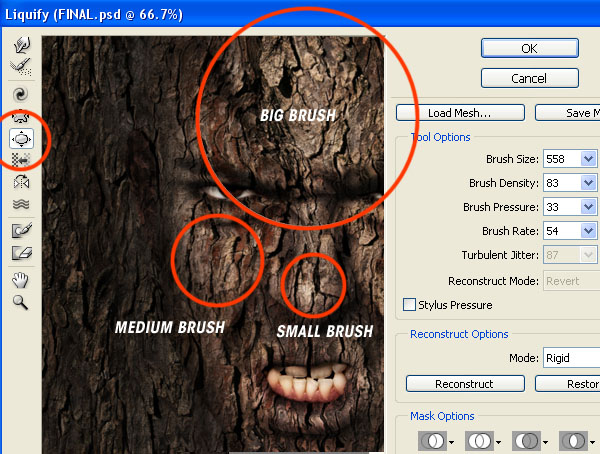
Step 2323步
Flatten the image and go to Filter > Liquify. 拼合图层,去过滤Liquify >。Select the Bloat tool and set up roughly how it is in the image below. 选择膨胀工具和建立大体在图像下面。We want to add a 3D quality to the areas such as cheeks, nose, and forehead. 我们需要增加一个3 D质量领域如脸颊,鼻子和额头。Select an appropriate Brush size for each of these areas and click on each a few times rather than dragging the brush around.选择一个合适的刷子大小对每一个这些区域和点击每一个几次,而不是拖动刷周围。
Conclusion结论
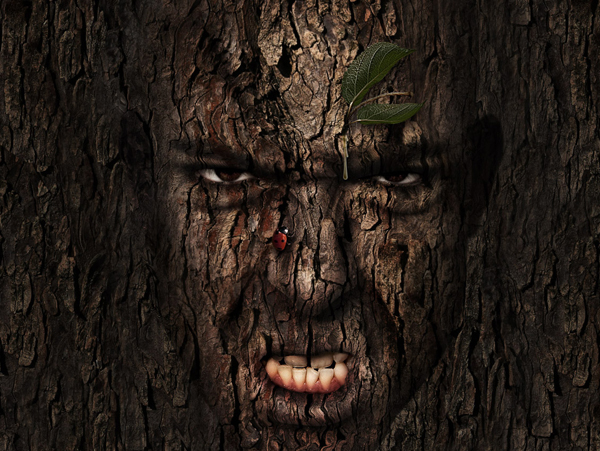
You can always add some real world effects such as leaves and bugs to the final image – go nuts. 你总是可以增加一些真实的世界的影响,如树叶和虫子到最后的形象——疯。This technique works for applying any texture to any surface, for example you could make a brand new Mercedes SLK rusty and riveted, or make a house out of skin. 该技术工作申请任何纹理任何表面,比如你可以建立一个新的梅赛德斯生锈的支架,背景或皮肤来盖房子。Go have fun whilst you perfect your craft. 当你去玩完善你的工艺。You can view the final image below or view a您可以查看的最后形象下面或者观点larger version here大图在这里.
![]() 喜欢
喜欢
0
![]() 赠金笔
赠金笔