 加载中…
加载中…一步一步教你安装CentOS8(截图)手册
标签:
centos8 |
分类: 系统知识 |
CentOS 8 has been released on September 24th, 2019. You now may be looking to try the world’s best opensource enterprise operating system.
CentOS 8 is derived from the source of Red Hat Enterprise Linux 8 and uses Linux kernel 4.18.
There is a new distribution called CentOS
stream,
New Features
READ: CentOS 8 New Features
Supported Architectures
CentOS 8 provides installation media for following architectures.
- AMD and Intel 64-bit architectures
- The 64-bit ARM architecture
- IBM Power Systems, Little Endian
System Requirements
At least 2 GB RAM is required to install CentOS 8. 4 GM RAM is recommended.
Download
CentOS 8
Click the below link to download the CentOS 8.
Choose the CentOS Linux DVD ISO image for the installation.
Install CentOS 8
Installation of CentOS 8 is very similar to CentOS 7, and you would not find any difficulty in getting the CentOS 8 ready for testing.
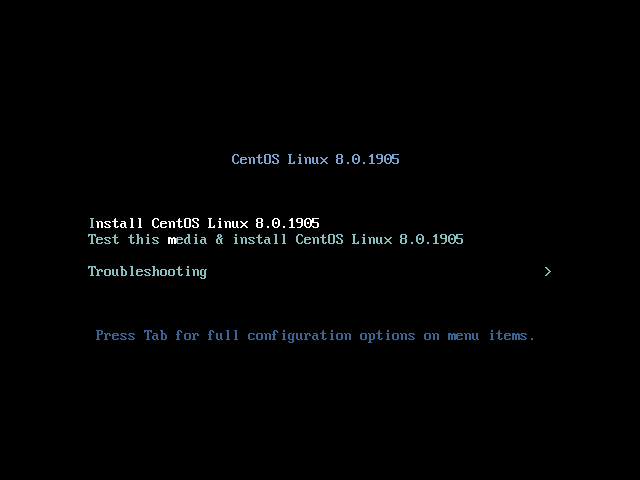
Boot the DVD and select Install CentOS Linux 8.0.1905 from the boot menu.
Select the language for CentOS 8 installation and continue.
https://www.itzgeek.com/wp-content/uploads/2019/09/Select-Language.pngSelect Language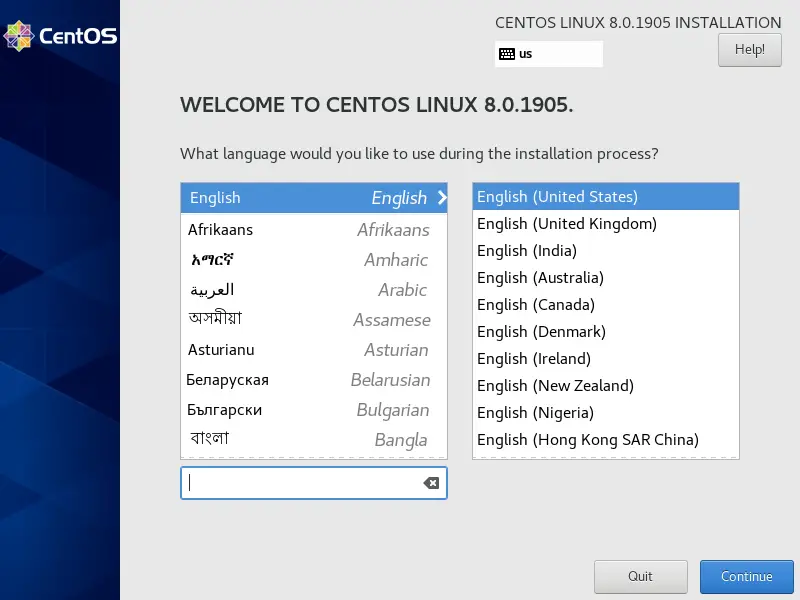
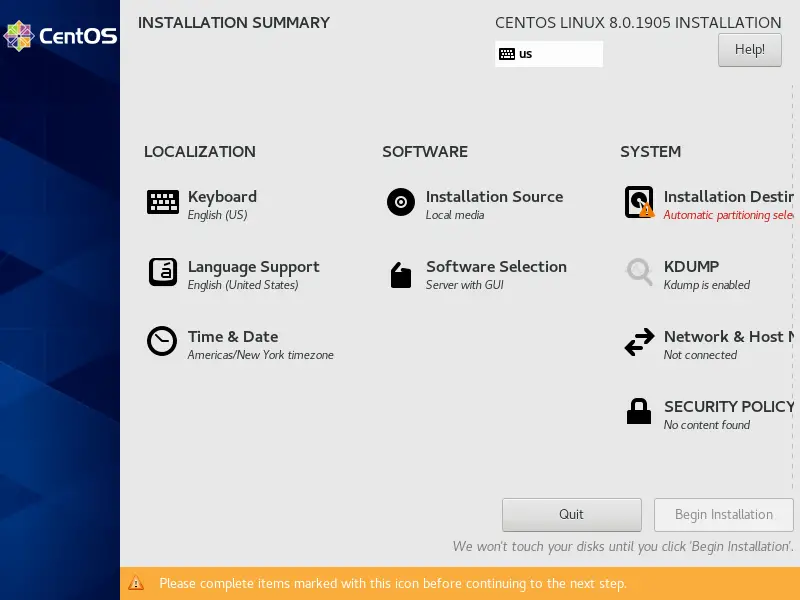
Next step is the installation summary. You must clear the warning messages for the CentOS installation.
You can change the settings by clicking on it.
- Localization
- Software
- System
Localization
- Keyboard
- Language Support
- Time & Date
Keyboard
Choose the keyboard layout. Keyboard tops the list will be the default.
Language Support
We have already set up Language Support.
Time & Date
Software
- Installation Source
- Software Selection
Installation Source
Leave the installation source be Local Media.
Software Selection
Software Installation lets you decide what all the packages you want to install along with the OS installation are.
There are five predefined installation types available to prepare your system for particular requirements.
- Server with GUI
- Server
- Minimal Install
- Workstation
- Custom Operating System (Need to choose manually)
- Virtualization Host
Choose the one from above that is suitable for your installation (I chose Server with GUI) and click on done.
https://www.itzgeek.com/wp-content/uploads/2019/09/Installation-Type.pngInstallation Type
System
- Installation Destination
- Kdump
- Network & Host Name
- Security Policy
- System Purpose
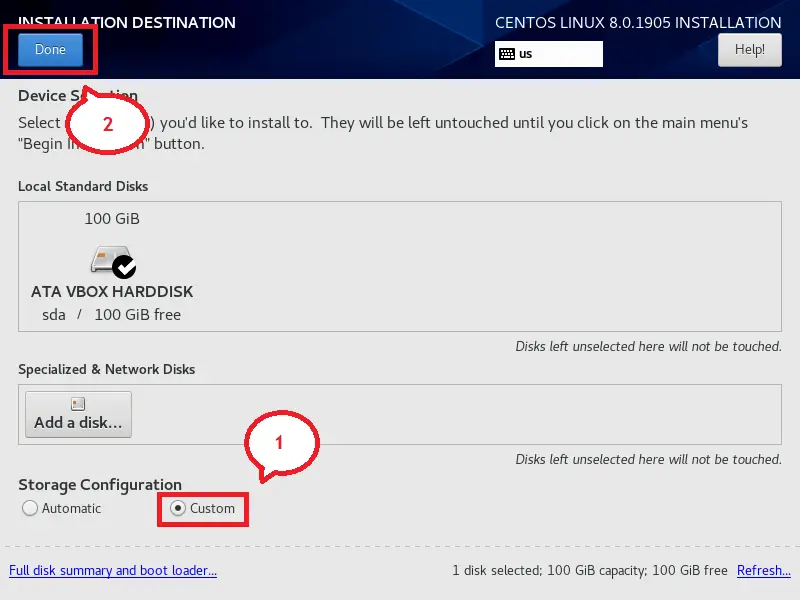
Installation Destination
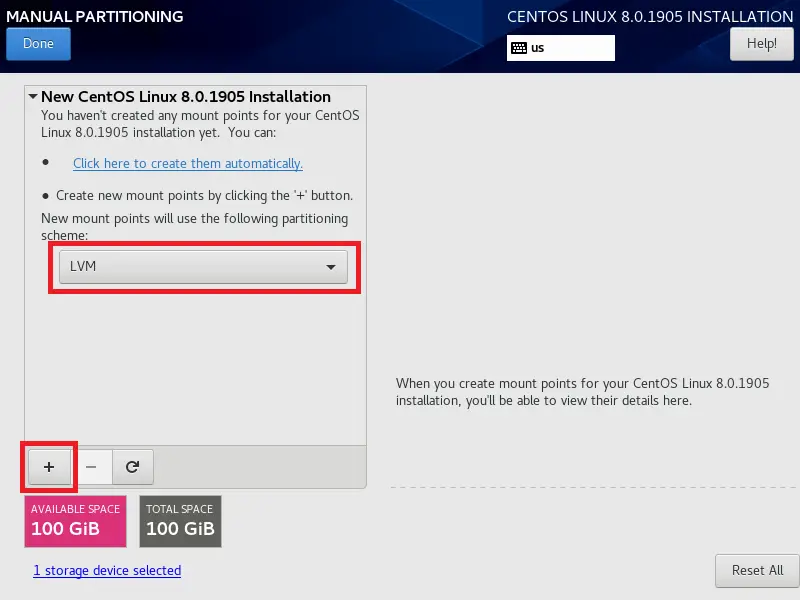
Click on Installation Destination to set up partitions for the installation.
Here, I will do the custom partition to suit below requirement (100GB Hard disk).
You can partition your system as per your need.
Standard Partition:
/boot: 1 GB (ext4)
LVM:
/home: 50GB (xfs)
/ (root): 30 GB (xfs)
swap: 4GB
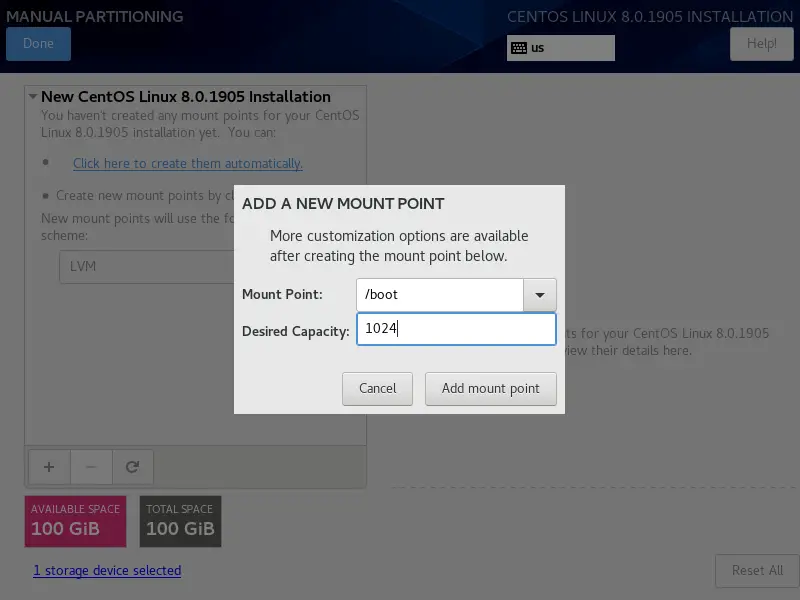
/boot: 1 GB
/home: 50GB
https://www.itzgeek.com/wp-content/uploads/2019/09/home-Partition.pnghome Partition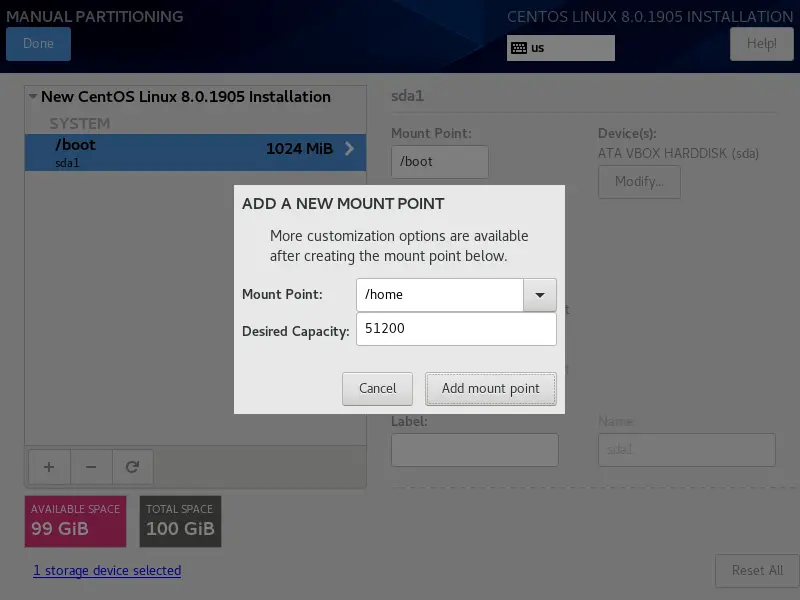
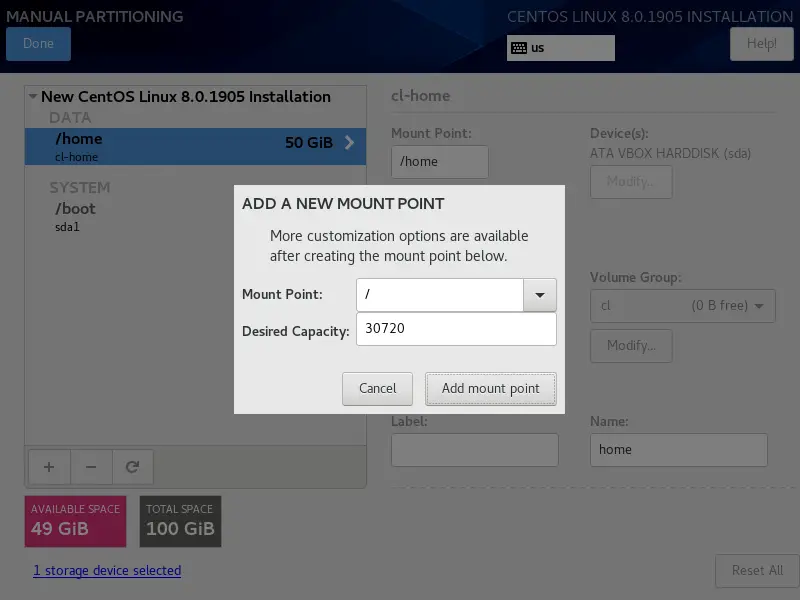
/ (root): 30 GB
swap: 4GB
https://www.itzgeek.com/wp-content/uploads/2019/09/SWAP.pngSWAP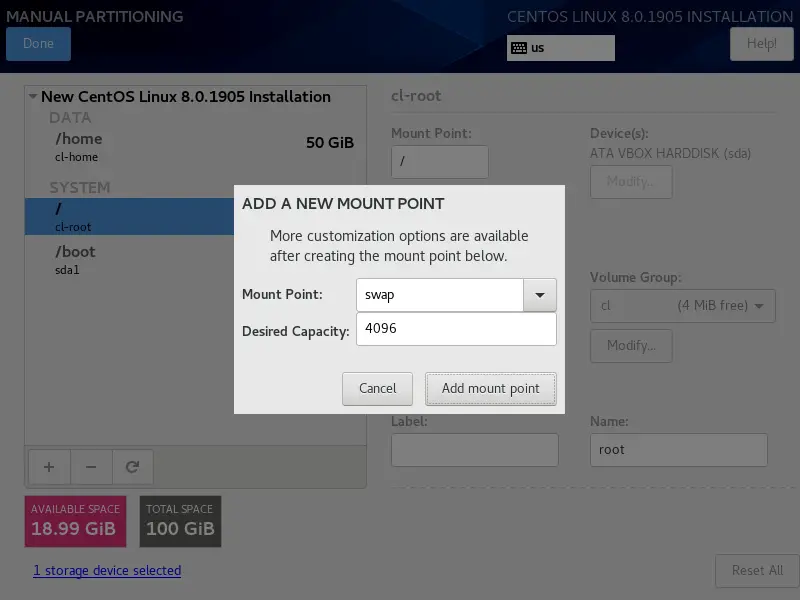
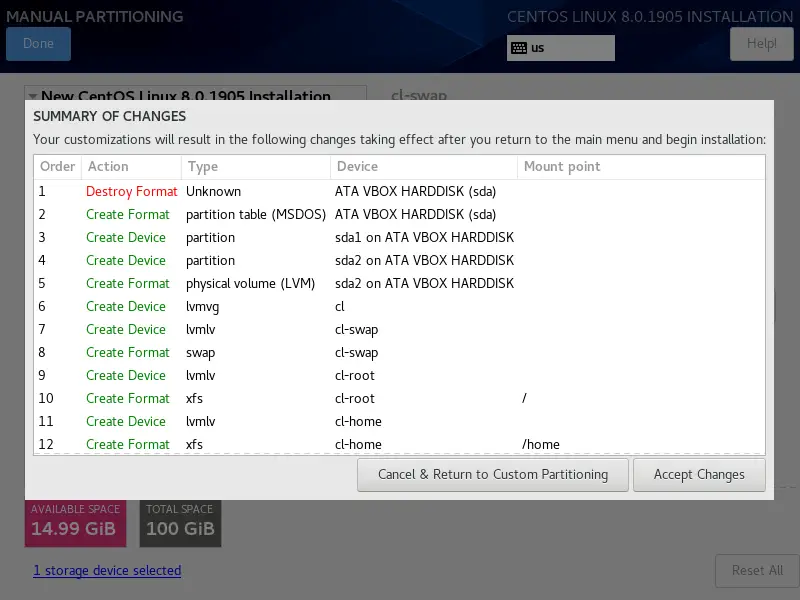
If you are okay with the partitioning, click Done.
https://www.itzgeek.com/wp-content/uploads/2019/09/Partition-Summary.pngPartition Summary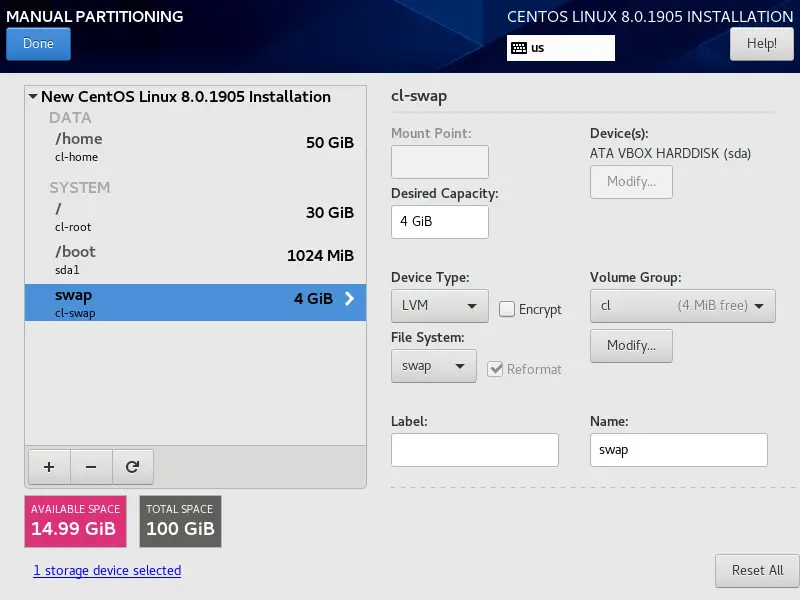
Click Accept Changes to create partitions.
KDUMP
Keep the KDUMP enabled.
https://www.itzgeek.com/wp-content/uploads/2019/09/KDUMP.pngKDUMP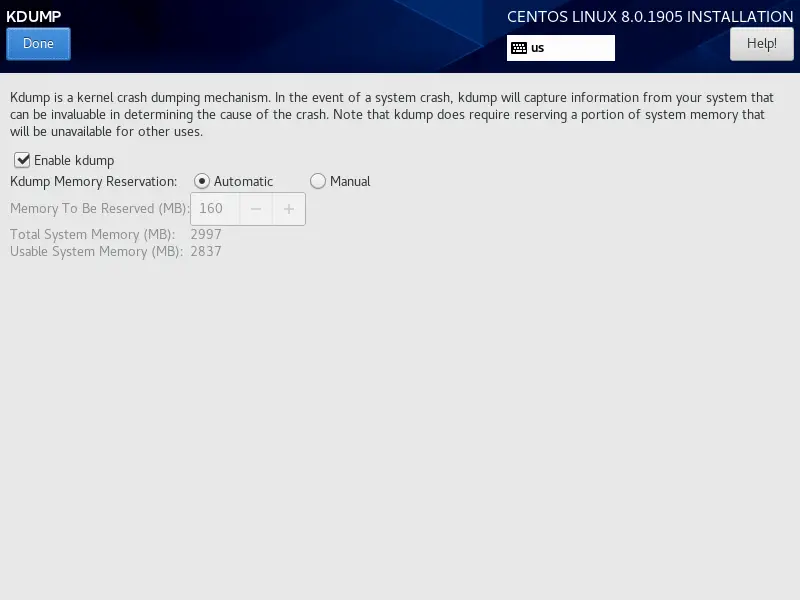
Network & Host Name
Click on the Network and Host Name to configure IP Address and set hostname for your system.
Type the hostname in the Host Name field and click Apply.
https://www.itzgeek.com/wp-content/uploads/2019/09/Set-Hostname.pngSet Host Name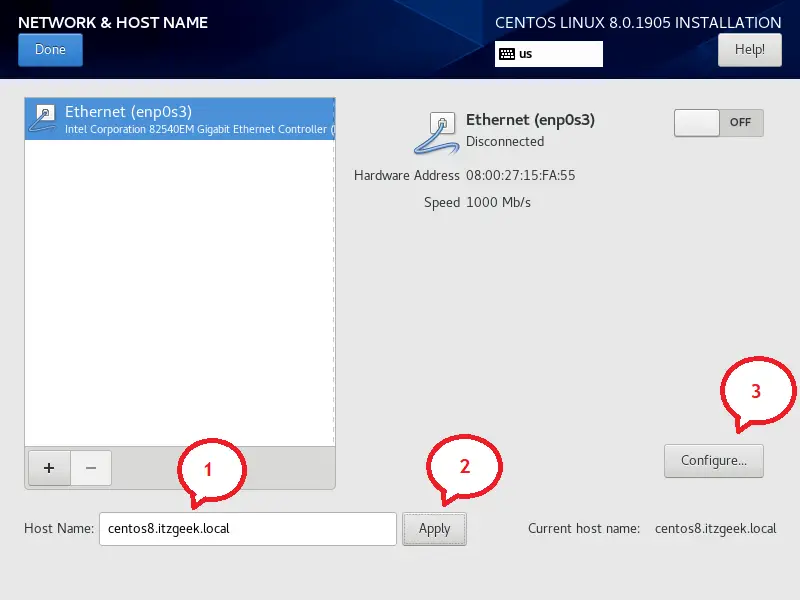
Then, click Configure in the above page to set up the IP Address.
https://www.itzgeek.com/wp-content/uploads/2019/09/Configure-IP-Address.pngConfigure IP Address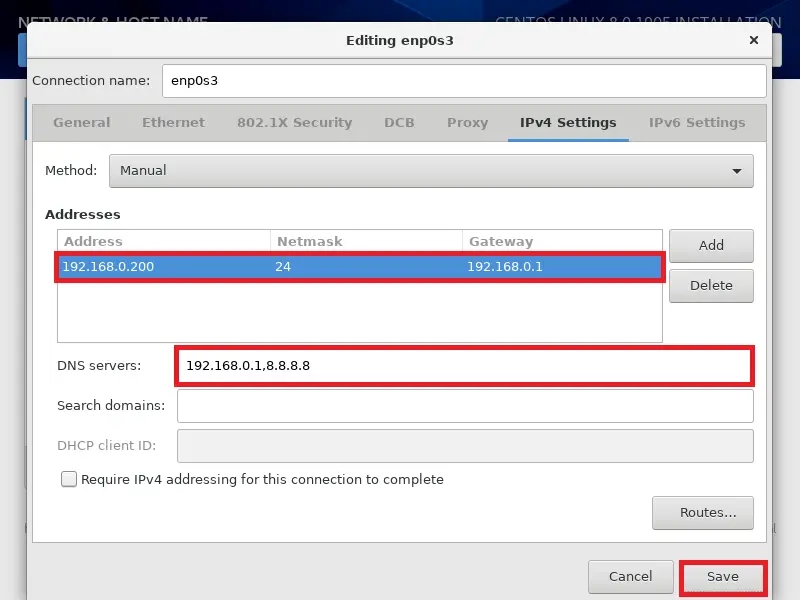
Enable the network connection by turning it on.
https://www.itzgeek.com/wp-content/uploads/2019/09/Enable-Network.pngEnable Network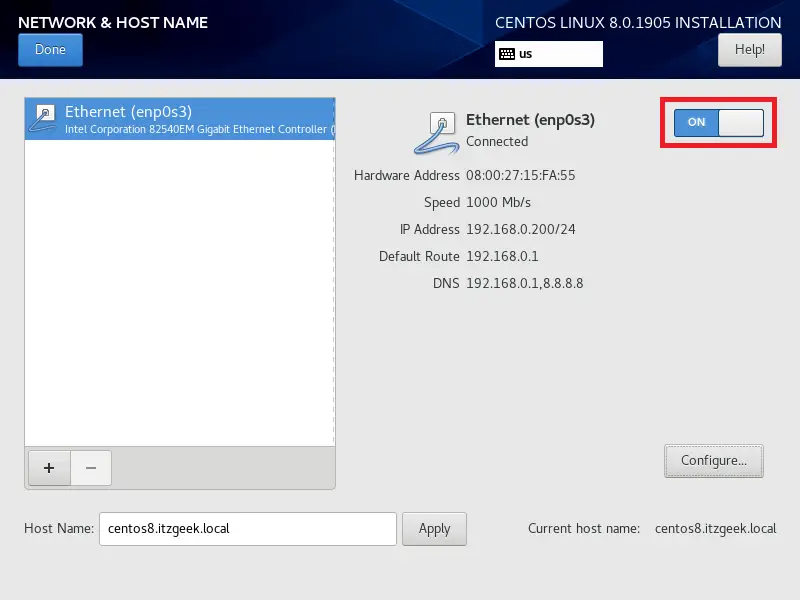
By now, you should not see any warnings in the Installation summary.
Click Begin Installation to start the installation of CentOS 8.
https://www.itzgeek.com/wp-content/uploads/2019/09/Begin-CentOS-8-Installation.pngBegin CentOS 8 Installation
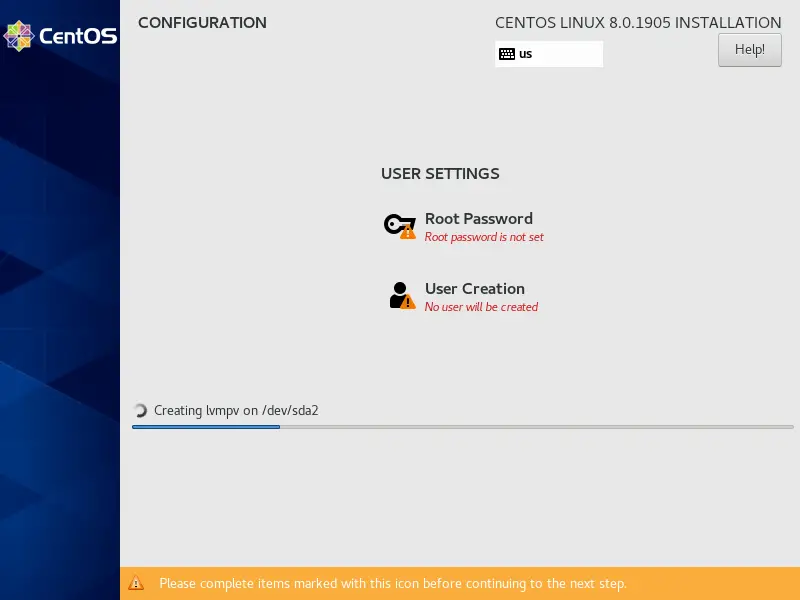
Configuration
The OS installer will now start to install the packages based on the installation type.
In the meantime, we will set up the following.
- Root Password
- User Creation
Root Password
Set the root password.
https://www.itzgeek.com/wp-content/uploads/2019/09/Set-Root-Password.pngSet Root Password
User Creation
Create a user (This is optional and can be created later).
https://www.itzgeek.com/wp-content/uploads/2019/09/Create-New-User.pngCreate New User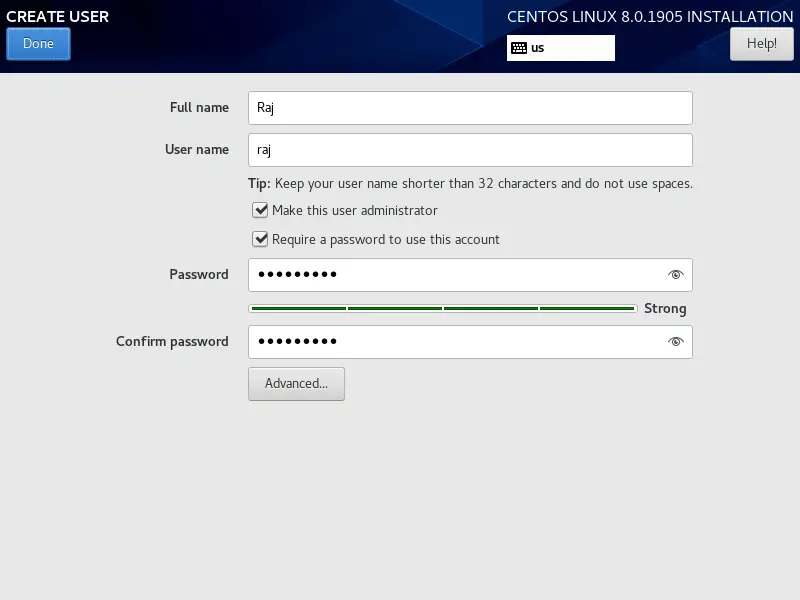
Wait for the installation to finish.
https://www.itzgeek.com/wp-content/uploads/2019/09/Installation-In-Progress.pngInstallation In Progress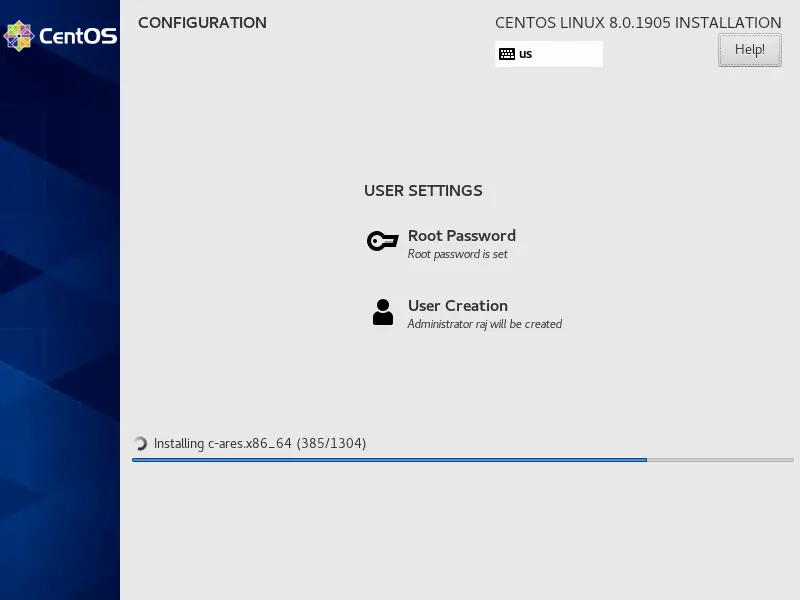
Once CentOS 8 installation is completed, reboot the system.
https://www.itzgeek.com/wp-content/uploads/2019/09/Installation-Completed.pngInstallation Completed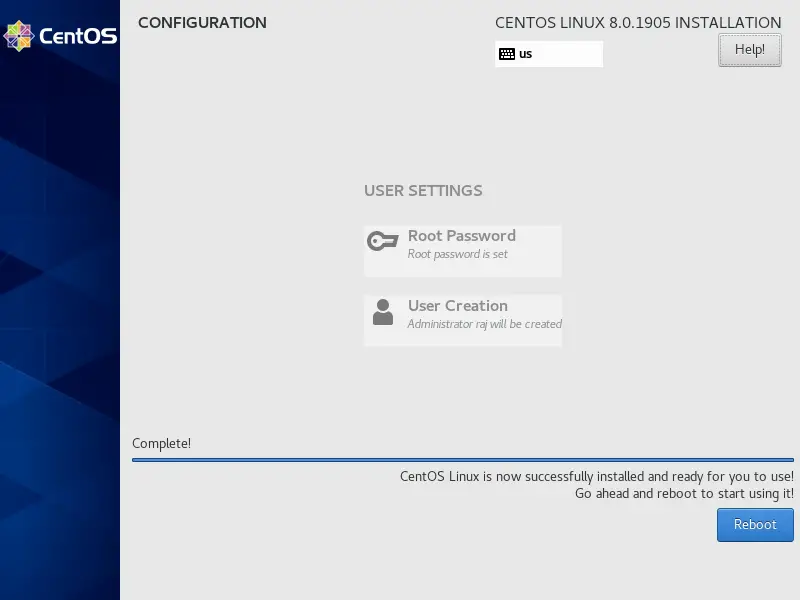
The system will boot and display the CentOS 8 menu screen something like below.
https://www.itzgeek.com/wp-content/uploads/2019/09/CentOS-8-Menu.pngCentOS 8 Menu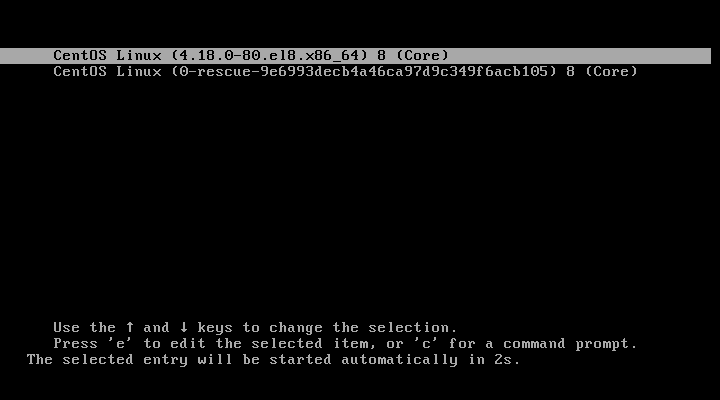
Post Installation
Click on License Information.
https://www.itzgeek.com/wp-content/uploads/2019/09/Post-Installation.pngPost Installation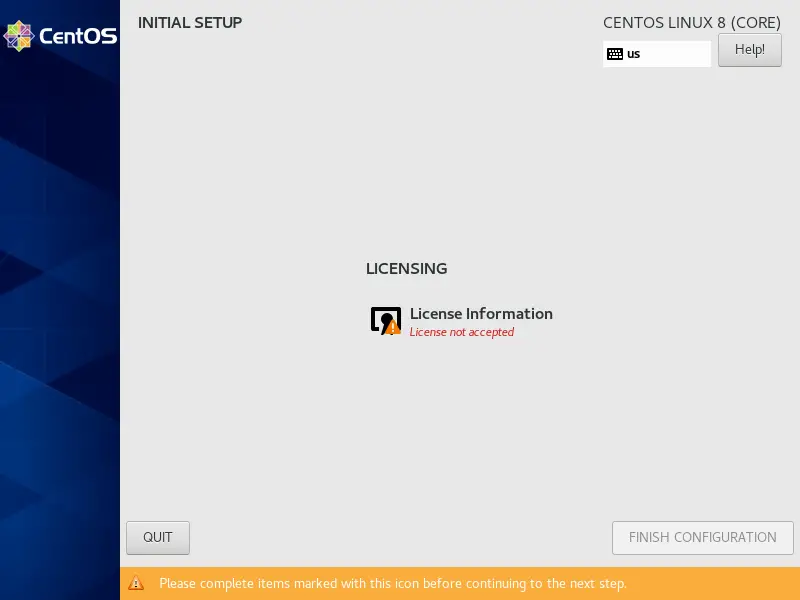
Select I accept the license agreement on the license agreement screen and click Done.
https://www.itzgeek.com/wp-content/uploads/2019/09/Accept-License.pngAccept License
Choose the user and login with the password.
https://www.itzgeek.com/wp-content/uploads/2019/09/Login-Screen-1.pngLogin Screen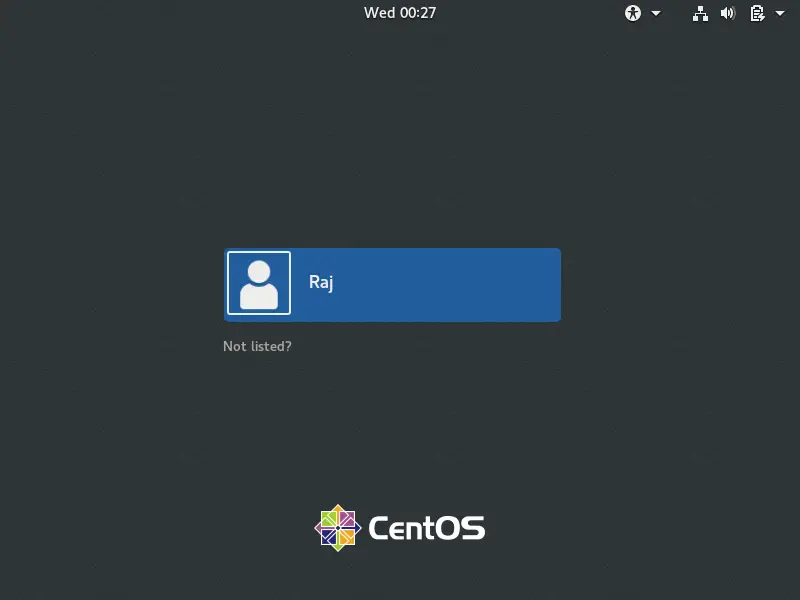
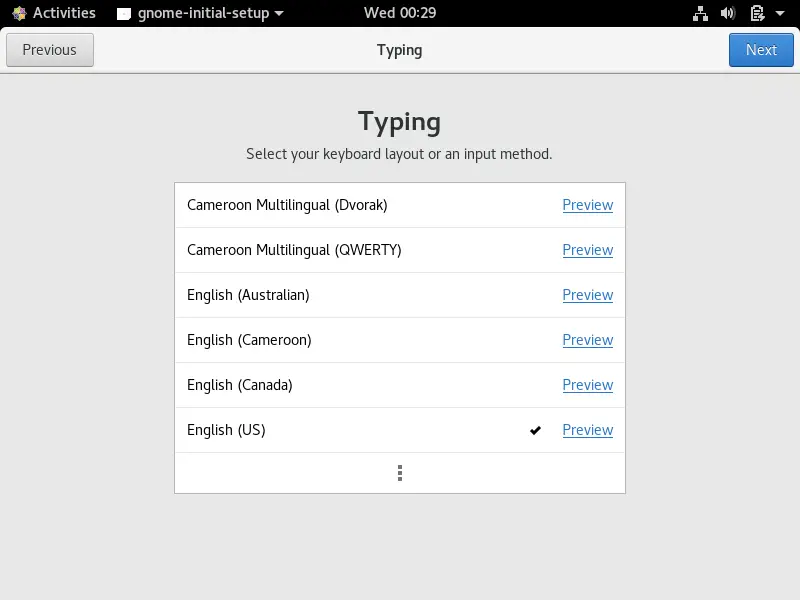
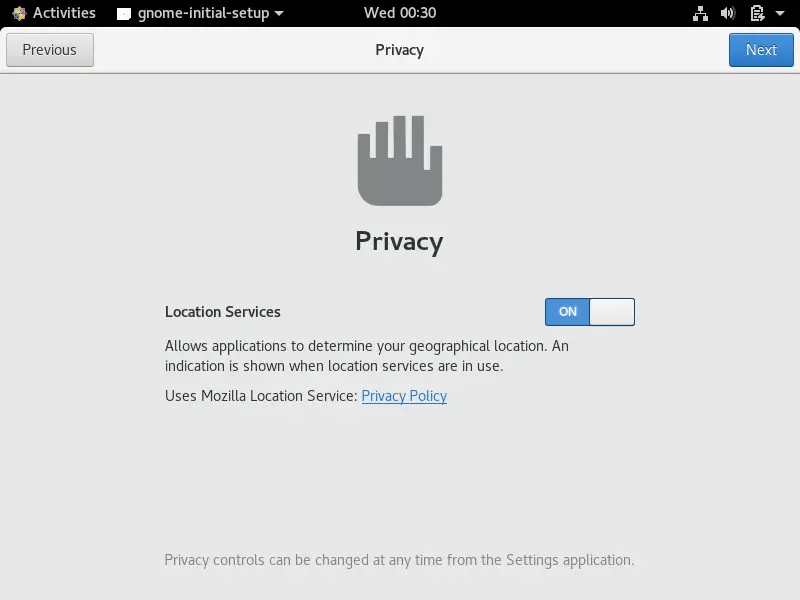
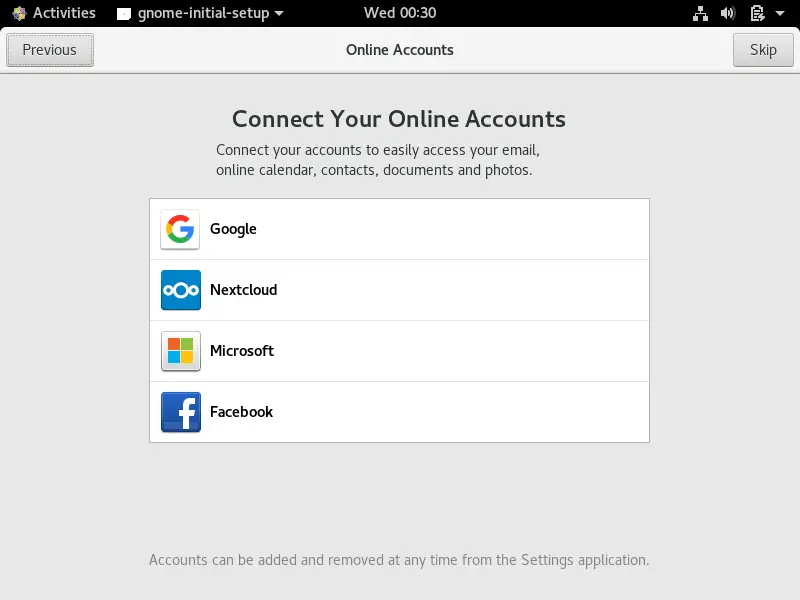
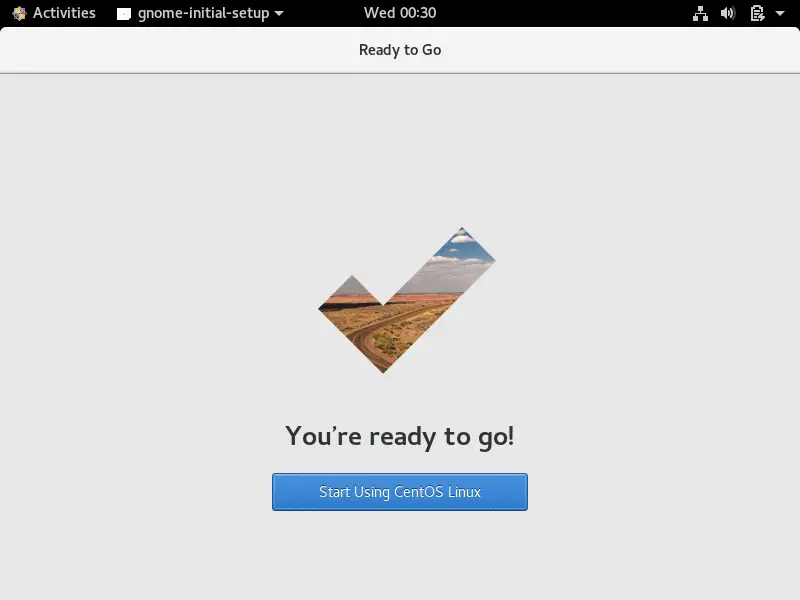
Perform remaining steps as per your requirement.
https://www.itzgeek.com/wp-content/uploads/2019/09/Welcome-Screen.pngWelcome Screenhttps://www.itzgeek.com/wp-content/uploads/2019/09/Keyboard-Layout.pngKeyboard Layouthttps://www.itzgeek.com/wp-content/uploads/2019/09/Connect-Online-Accounts.pngConnect Online Accountshttps://www.itzgeek.com/wp-content/uploads/2019/09/Start-Using-CentOS-Linux.pngStart Using CentOS Linux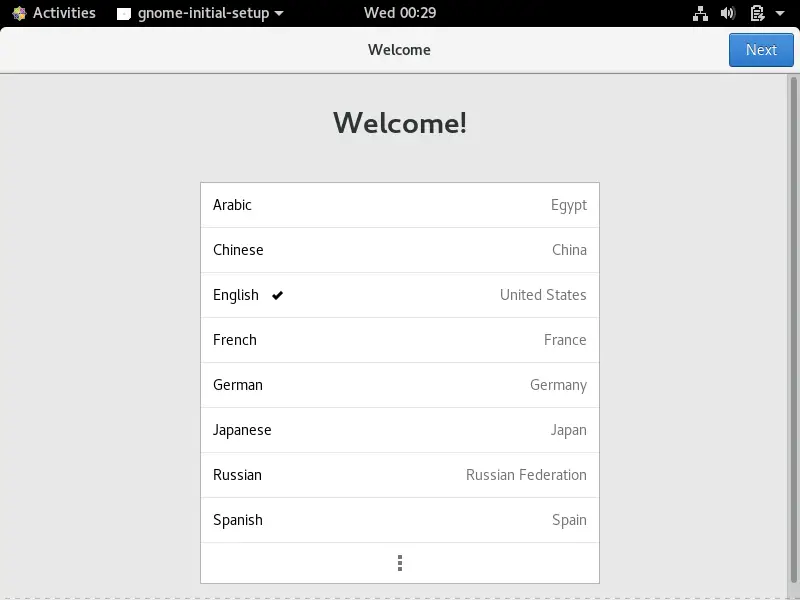
Finally, you will get Getting Started with CentOS 8.
https://www.itzgeek.com/wp-content/uploads/2019/09/Getting-Started.pngGetting Started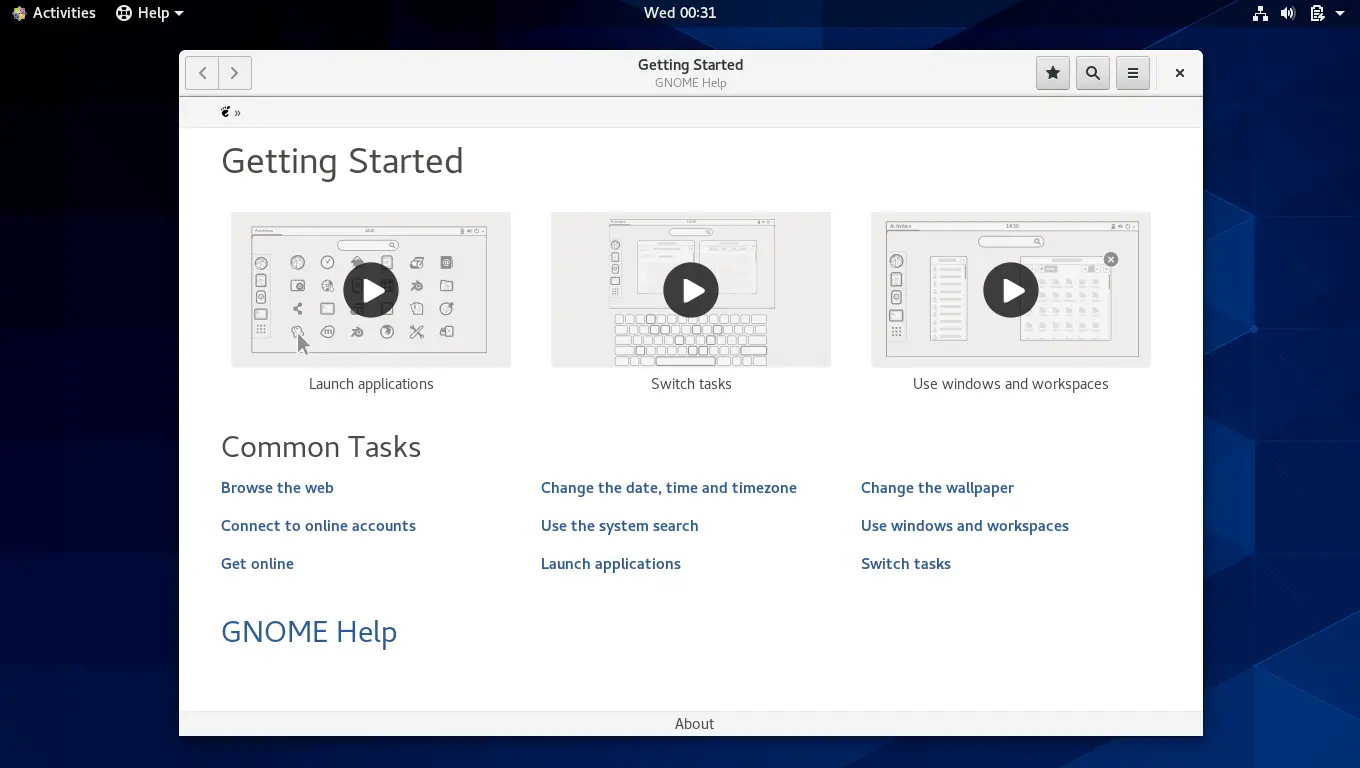
Conclusion
That’s All. I hope you learned how to install CentOS 8.
![]() 喜欢
喜欢
0
![]() 赠金笔
赠金笔